DIY
THE LINEN CUPBOARD: ALL THE DETAILS
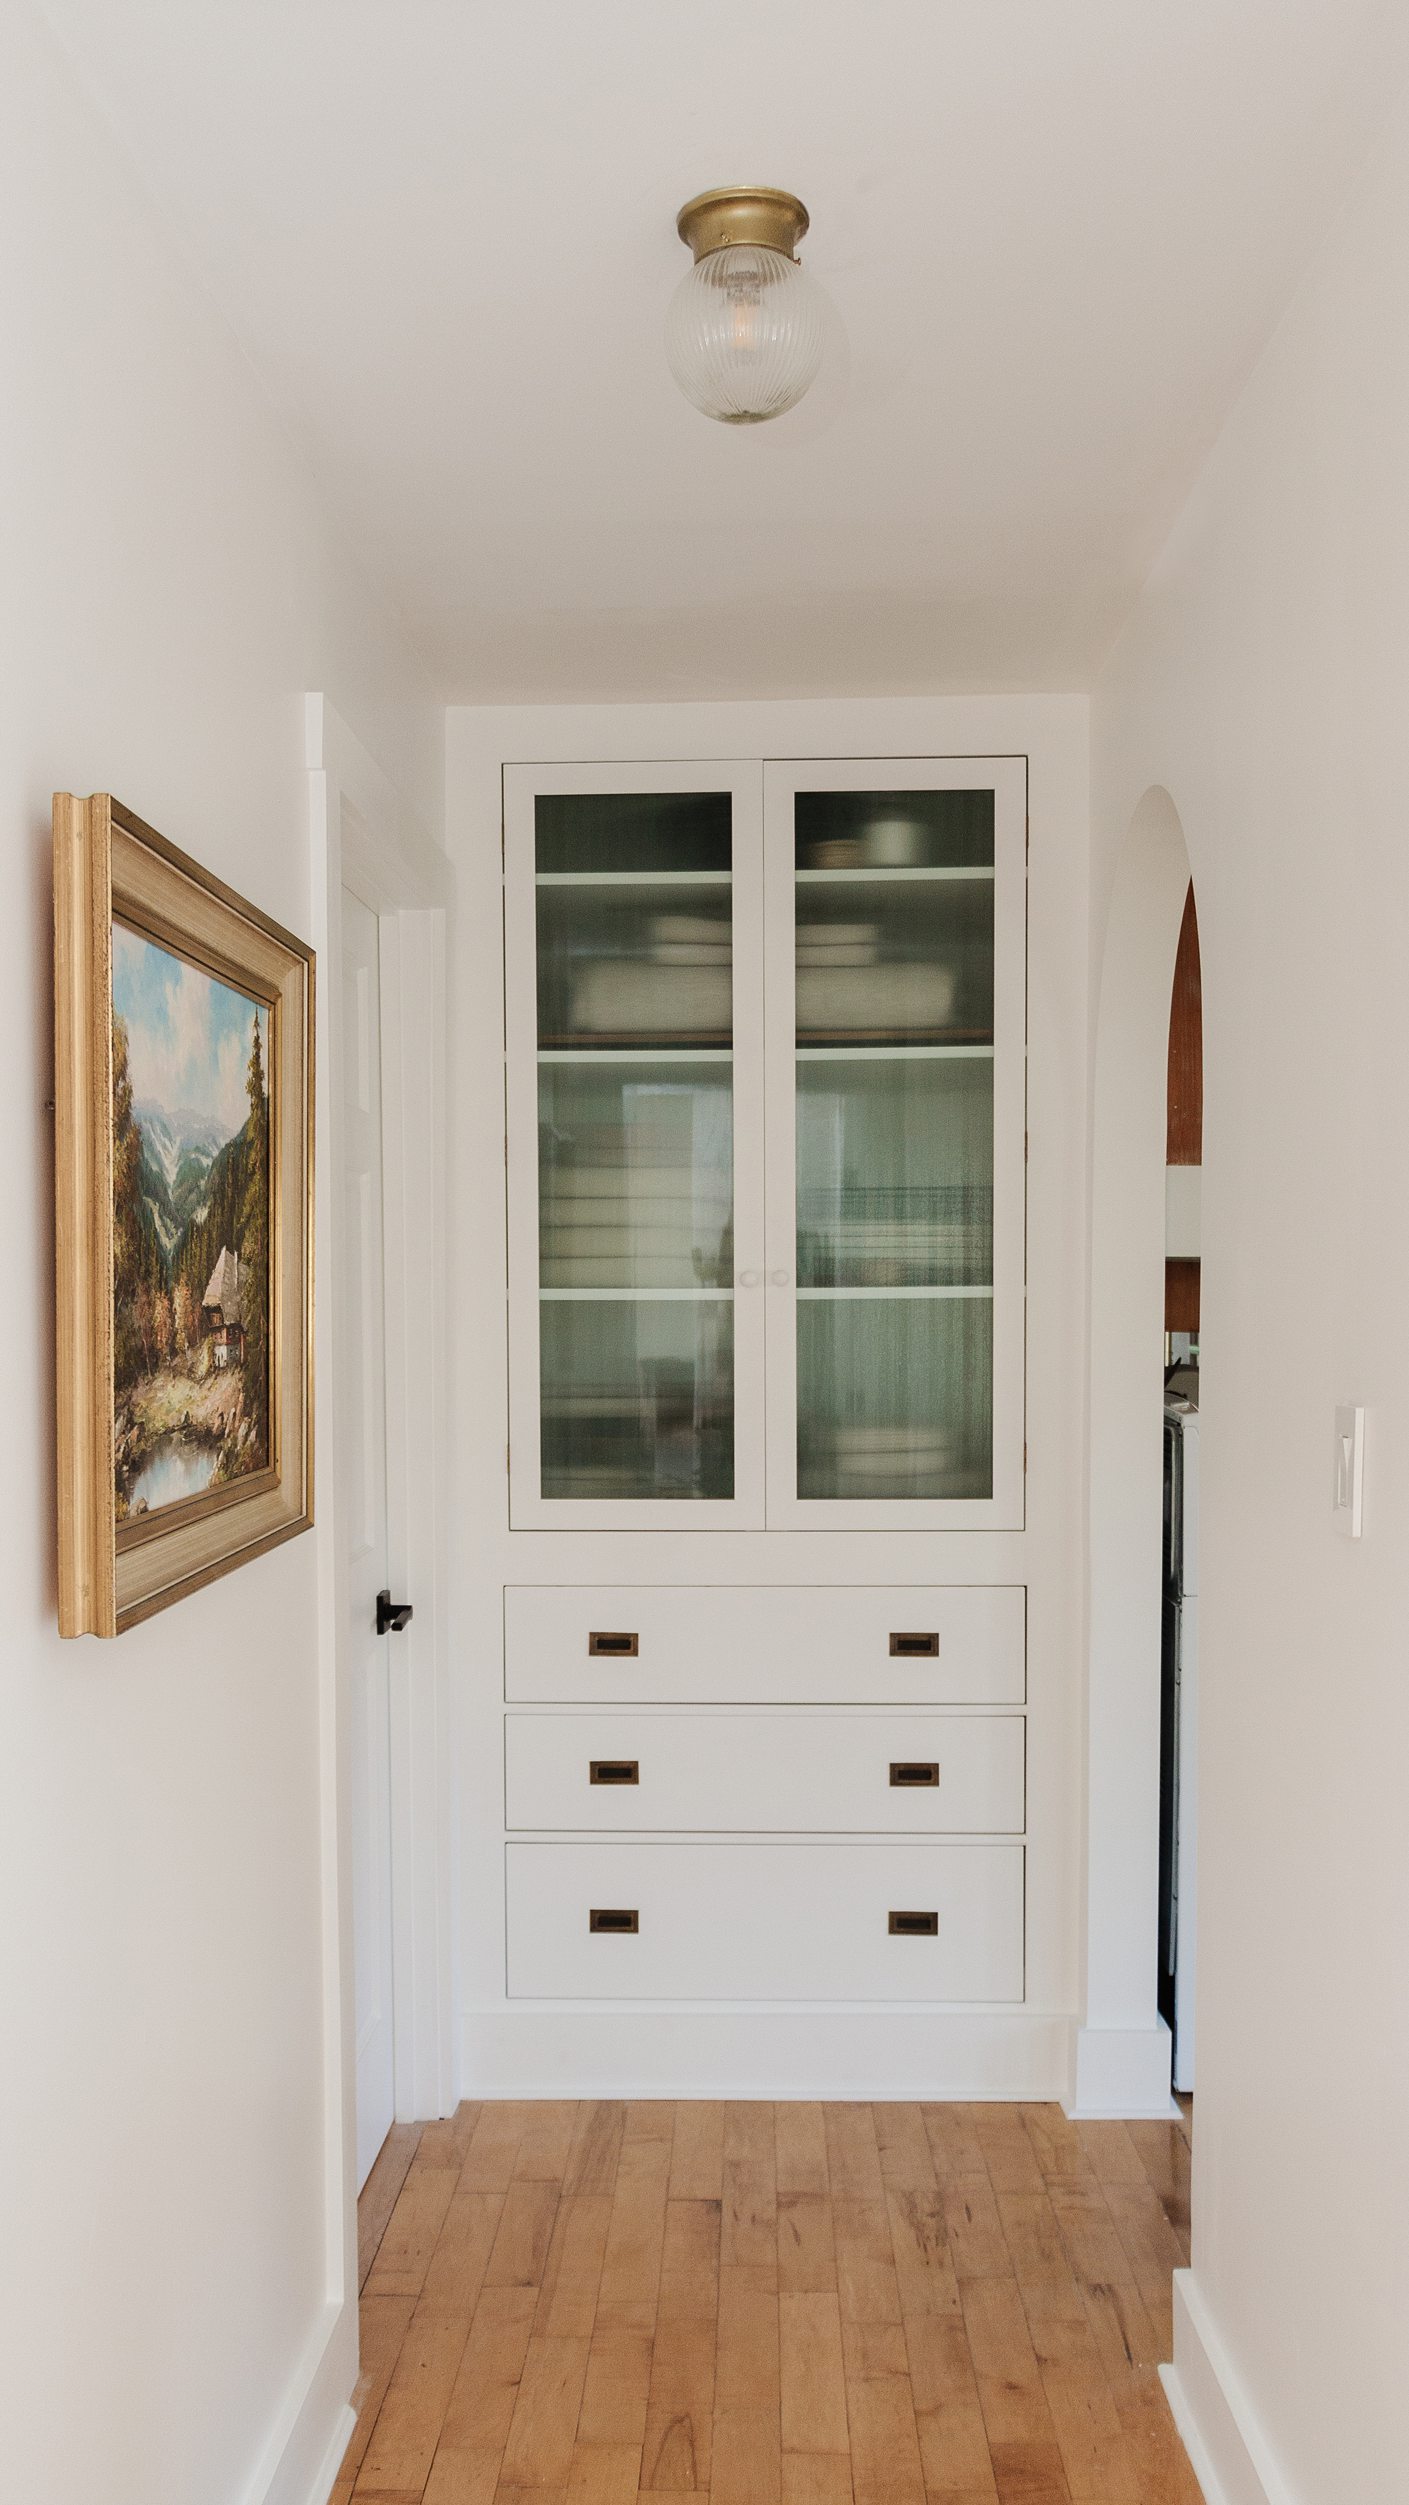
By far, the most frequently asked questions I get are about the DL House linen cupboard. “What Ikea dresser did you use on the bottom?” “What is on the top?”
While in-depth build tutorials are not my thing, I think a more technical look at this specific build will help answer a lot of questions!
The following progress photos are from past Instagram stories, so please forgive the lack of higher-quality photos.
But first, I will explain my overall direction with this design. I wanted the final look to be timeless, like it has always been there. Additionally, I wanted it to be low profile and visually quiet. To get these characteristics, I opted for a built-in look with inset doors and drawers. I decided on inset flush drawer pulls and white wooden knobs (to camouflage). These small details helped to achieve this look.

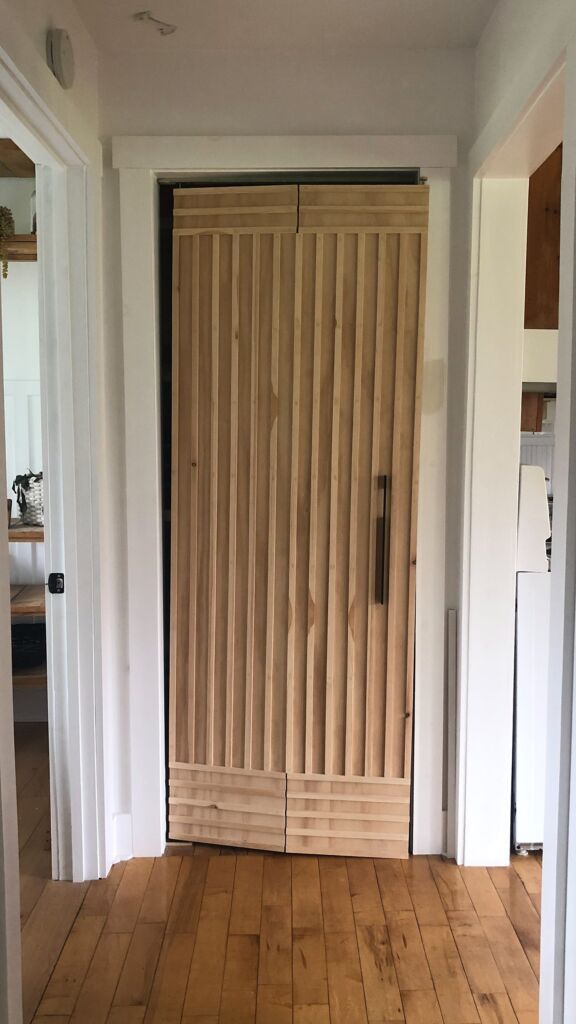
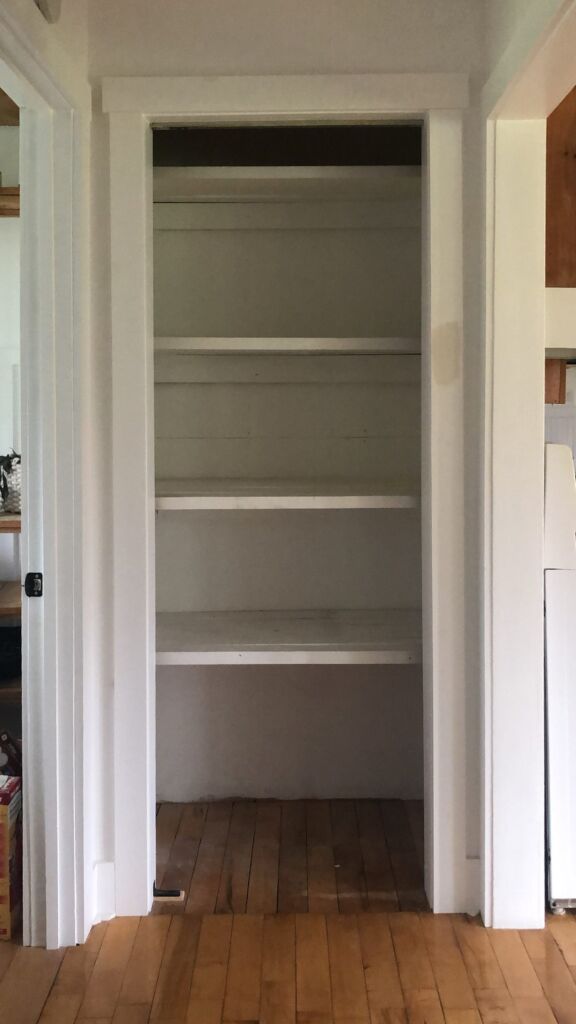
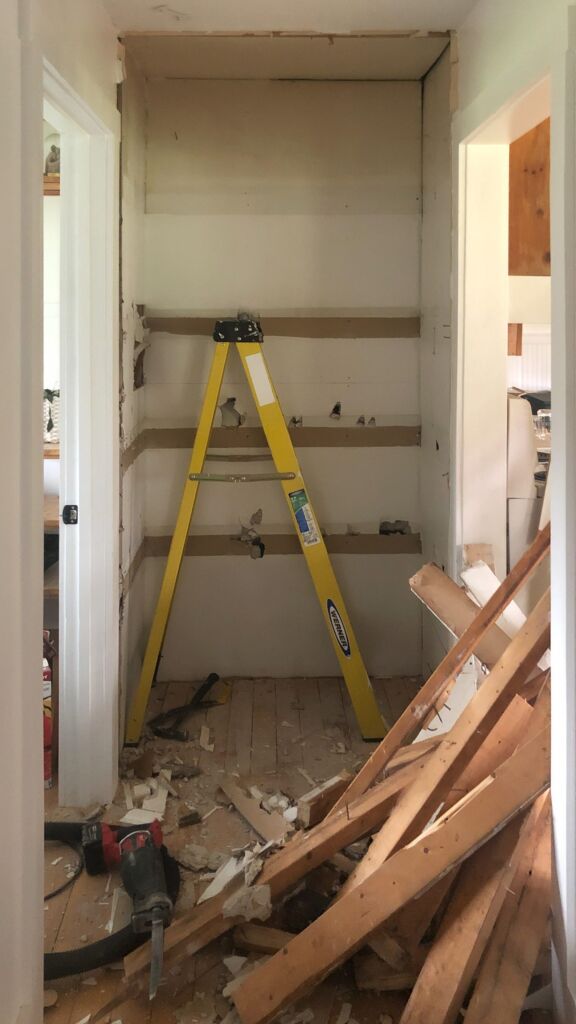
Below are a few photos of the closet space before and during the demolition stage. This gives an idea of where this design works. However, it would work in a number of other spaces too, as long as you can find a suitable dresser with the correct dimensions or you are willing to build one from scratch.
1
2
3
1 | The space started as a traditional linen closet with a bi-fold door.
2 | It had a few built-in shelves and was very roughly finished on the inside.
3 | Demolition included removing all the trim and framing. Once this was done the hallway walls and the interior closet walls were flush (with the exception of where the framing once was).

4

5

6
4 | I started re-building the space by framing in an IKEA Hemnes dresser. When shopping for a dresser, I made sure that the width dimension allowed for a few inches on either side. This is because I needed space for two pieces of wood to secure the dresser to the opening. It also allowed for the drawers to clear the door trim on the left when opened. I secured these pieces of wood to the existing 2x4s in the wall and then to the dresser. Luckily there were existing 2x4s where I needed them. Otherwise, I would have had to tear off drywall to laminate 2x4s to get framing to where I needed it.
5 | I set those two pieces of wood in 1/2″ from the face of the dresser to allow for the face trim (the finished surface). The reason I chose 1/2″ material for the finished surface was two-fold: budget and the existing drywall was 1/2″, making it easier to stay consistent.
6 | I secured the top of the dresser (the piece that came with it), setting it in 1/2″ from the face of the dresser. Again, to allow for the face trim. I cut a piece of 3/4″ MDF (you can use 1/2″ or 5/8″) to fit the whole opening. I secured it to the dresser top and a furring strip on the back wall. This is because the dresser top did not reach the back of the opening. This piece serves as the first shelf in the upper cabinet.

7

8

9
7 | I installed the drywall on all three walls and the ceiling. The existing drywall was in rough shape and it was the easiest route to take. I taped (including where the drywall meets MDF shelf), mudded, and sanded.
8 | Then I started to install shelves. I opted for four shelves in total, with one being the top of the dresser. I secured three sets of brackets to the studs. The length of the brackets is such that they are 1/2″ shallower than the face of the dresser. If you draw a line up from the wood framing on either side of the dresser (which is set in 1/2″ from the face of the dresser too) with a plumb level, that will tell you how long the brackets need to be. I also secured a furring strip on the ceiling too for the face trim.
9 | Then I cut shelves out of 5/8″ HDF. I chose dimensions such that the shelves extend fully from the back of the cupboard to the front face trim.

10

11

12
10 | Next step was the face trim. I used 1/2″ MDF. I closed the hole at the bottom of the dresser. Then started to install the face trim everywhere else. The width of the face trim was determined by the width from the wall on the left/right to the drawer reveal.
11 | The vertical pieces of face trim were secured to the shelves/shelf brackets with brad nails. The top horizontal piece of face trim was secured to that furring strip mentioned previously. Next, I taped and mudded where necessary to make the finished surface seamless. You can see that once the face trim and dresser were mudded and seamless, naturally, that was the determining width for all other face trim.
12 | I ironed edge tape onto the shelves to get a smooth finish. This is because I used HDF which has a particleboard-like edge. I installed baseboard trim. And finally, I painted.

13

14

15
13 | I installed the drawer pulls and started putting towels and linens in their new home.
14 | The last element was the doors. I made the door frames out of maple. I opted for hardwood to minimize warping. I used these butt hinges, spraying them an antique brass to match the drawer pulls. On the inside of the door frame was a channel to accommodate the glass I had my eye on. I opted to install the doors prior to ordering the glass so I could take exact dimensions with the doors in place.
15 | Once the glass arrived, I installed it with a bead of silicone (on the inside) and held it in place with clamps until it dried.
I hope this was helpful. I appreciate all the interest in this project. It is one of my favourites in our home.


